Method 3: The Wordpress Method
This page describes the method for installing tracking on Wordpress.
Step 1: Create a landing page and a thank you page (Optional)
If you already have a landing page and a thank you page (after validating the form), go to the next step.
Create a contact form
To create a contact form (demo request, free trial,...),
- install the plugin Contact Form 7 then activate it.
- Then go to “Contact” in the WordPress navigation menu and then “Create a form”.
- Paste it Short Code from the form to where you want the form to appear on your Landing Page.
Create a validation redirect
For Contact Form 7 to redirect the user after the user has validated the form:
- install the plugin Contact Form 7 Redirect
- Edit your form and add the destination URL to the “Choose Page” list in the “Redirect Settings” tab.
Step 2: insert the Appvizer tracking codes into the pages
WordPress does not natively allow you to put javascript in your pages. To do so, follow these steps:
- Add the plugin Insert Html Snippet to your site
- Activate the plugin
- In the WordPress side menu, go to “XYZ Html”
- Click on “Add New HTML Snippet” > name the snippet “tracking-appvizer-visit ” > paste the first script > Save.
- Click on “Add New HTML Snippet” > name the snippet “tracking-appvizer-conversion ” > paste the second script > Save.
- Open your Landing Page then insert the code “tracking-appvizer-visit” in the page using the “HTML” icon located in the edit menu of the page then save.
- Open your thank you page then insert the code “tracking-appvizer-Conversion” in the page using the “HTML” icon located in the edit menu of the page then save.
Where can I find the scripts to use?
See you at the Method 1 to copy and paste all the sample scripts, regardless of whether you have one or more programs.
Step 3: Verify the installation
Congratulations, you have installed your Appvizer tracking scripts on your website!
Do a test
- Fill out your form to test and see if a conversion goes up in your Appvizer customer area.
- The conversions made on D-day will be visible on D-day+1 in your space.
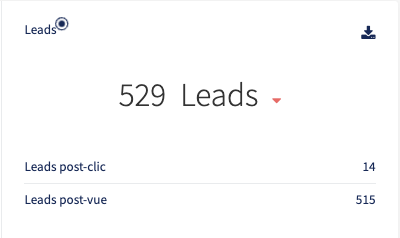
Example:
Check on Chrome browser
Now, check that the installation has been completed correctly to make sure you don't miss any leads.
- Open your browser console;
- Go to the “Network” tab, then the “XHR” sub-tab;
- Check the “Preserve logs” option;

- Trigger the event by refreshing the page for example;
- Look for the term “appvizer” in requests: a request called “external-event” of the post type must be present. If you cannot find these events, the script is not properly installed.
- Verify the details of the information sent. The details for a conversion event are as follows:
{id: "AP-XXXXX", externalId: XXXXXXXX, event: "conversion"}<br>event: "conversion"<br>externalId: 1570191937253<br>id: "AP-XXXXX"
If the event field does not have the correct visit or conversion tag and the id field is not yours, the script is not well installed.