Method 2: The Google Tag Manager Method
This page describes how to install tracking with Google Tag Manager (GTM).
Step 1: Copy your Appvizer tracking codes
There are several ways to retrieve your tracking codes.
Retrieve your ready-to-use codes in your Appvizer customer area
- Log on to https://www.appvizer.com/login.
- Go to the “My analyses” tab.
- In the Overview, copy the code from the first field.

This code should be placed on the landing page for each software, in order to track the number of users who arrived on this page from Appvizer.
Note: this code must be installed on all pages of the site to count visits to other pages.
- Copy the tracking code from the second field.
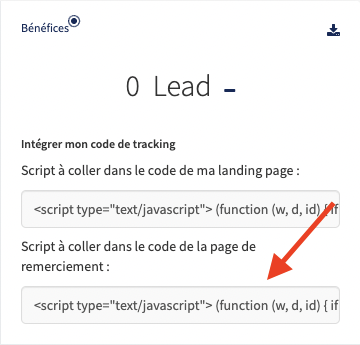
This code must be placed on the page after validation of the form for each software, in order to track the number of conversions from Appvizer.
✅ These codes are already set up for your software.
Note: if you have several programs and several landing and validation pages, you must retrieve each of the two codes above for each software and for each page.
Retrieve and adapt the following codes for 1 software
1 ️ ※ This first code must be placed on the landing page for each software, in order to track the number of users who arrived on this page from Appvizer.
- Copy the code below:
<script type="text/javascript">
  (function (w, d, id) {
    if(w.av) { return; }
      var ts = new Date().getTime();
      w.avURL = w.avURL || 'https://appvizer.one';
      w.avPool = w.avPool || [];
      w.avPool.push({start: ts, id: id});
      w.av = function () {w.avPool.push(arguments)};
      var e = document.createElement("script");
      e.async = true;
      e.src = w.avURL + '/ariadne/v1/ariadne.js?ts=' + ts;
      d.getElementsByTagName("head")[0].appendChild(e);
    })(window, document, 'AP-XXXXX');
  av("visit");
</script>- Adapt the code Line 13 with the identifier of your software on Appvizer.
How do you know your software identifier (s)? The identifier follows the form “AP-XXXXX”: the number is in the URL of the profile editing page accessible from your personal account (see screenshot below).
In this example the identifier is “AP-25655” (AP- followed by the number). Each identifier corresponds to a software referenced in Appvizer. In some cases, you will need to use multiple codes.

2 ️ ※ This second code must be placed on the page after validation of the form for each software, in order to track the number of conversions from Appvizer.
- Copy the code below:
<script type="text/javascript">
  (function (w, d, id) {
    if(w.av) { return; }
    var ts = new Date().getTime();
    w.avURL = w.avURL || 'https://appvizer.one';
    w.avPool = w.avPool || [];
    w.avPool.push({start: ts, id: id});
    w.av = function () { w.avPool.push(arguments) };
    var e = document.createElement("script");
    e.async = true;
    e.src = w.avURL + '/ariadne/v1/ariadne.js?ts=' + ts;
    d.getElementsByTagName("head")[0].appendChild(e);
  })(window, document, 'AP-XXXXX');
  av("conversion");
</script>- Adapt the code Line 13 with the identifier of your software on Appvizer.
Retrieve and adapt the following codes for several programs
If you have several applications on Appvizer, but only one landing page and/or one registration form for several applications, follow the procedure below to retrieve your tracking codes.
Appvizer does not recommend this method because for each completed form, one visit and one lead will be counted for all your software.
1 ️ ※ This first code must be placed on the landing page.
- Copy the code below:
<script type="text/javascript">
  (function (w, d, id) {
    if(w.av) { return; }
    var ts = new Date().getTime();
    w.avURL = w.avURL || 'https://appvizer.one';
    w.avPool = w.avPool || [];
    w.avPool.push({start: ts, id: id});
    w.av = function () { w.avPool.push(arguments) };
    var e = document.createElement("script");
    e.async = true;
    e.src = w.avURL + '/ariadne/v1/ariadne.js?ts=' + ts;
    d.getElementsByTagName("head")[0].appendChild(e);
  })(window, document);
  av("visit", {id: 'AP-XXXXX'});
  av("visit", {id: 'AP-YYYYY'});
</script>- Adapt the code lines 14 and 15 with the identifier of your software on Appvizer.
2 ️ ※ This second code must be placed on the page after validation of the form.
- Copy the code below:
<script type="text/javascript">
  (function (w, d, id) {
    if(w.av) { return; }
    var ts = new Date().getTime();
    w.avURL = w.avURL || 'https://appvizer.one';
    w.avPool = w.avPool || [];
    w.avPool.push({start: ts, id: id});
    w.av = function () { w.avPool.push(arguments) };
    var e = document.createElement("script");
    e.async = true;
    e.src = w.avURL + '/ariadne/v1/ariadne.js?ts=' + ts;
    d.getElementsByTagName("head")[0].appendChild(e);
  })(window, document);
  av("conversion", {id: 'AP-XXXXX'});
  av("conversion", {id: 'AP-YYYYY'});
</script>- Adapt the code lines 14 and 15 with the identifier of your software on Appvizer.
Step 2: install the tracking code
Add a tag in GTM
Visits
Adding a tag in GTM allows you to insert the tracking code for visits into GTM.
For this:
- Connect to GTM
- Click on the Tags menu
- Click on “New”

- Name the tag “Appvizer Visits”
- Click in the gray circle

- Choose from the “Custom HTML” menu

- Paste the retrieved visit script to Step 1 in the window.

Conversions
To create a tag in GTM for tracking conversions, the process is the same as for visits, you just need to change the title of the tag: “Appvizer conversions” and the content of the code (see Step 1).
Add a trigger in GTM
The trigger in GTM is the event that allows you to launch the beacon connected to it. For the Visits, the trigger is very simple: “all page views”.
This means that the tracking of visits will be triggered on all pages viewed by a Visitor. The trigger for Conversions is more complex to determine, we will see it next.
Trigger for the Appvizer Visits tag in GTM
- To add the trigger to the Appvizer Visits tag, open it then click on the gray circle in the “Trigger” area

- In the list of triggers, click All Pages.
- Then click on”Save”
Appvizer Conversions tag trigger in GTM
Creating a conversion tag follows the same process as creating visit tags.
However, the trigger depends on the conversion chosen (or conversions). You can add several conversions to the same tag, for example for the following conversions:
- sending a contact form (demo request, question, etc.)
- creating a free trial account
- visit a particular page (such as a “thank-you page”)
To create your trigger, click on the Bluest Plus (+) located at the top right on the Choose a trigger page.
Here is a list of the most used triggers:

“Page view” allows you to choose a specific page as the trigger.
For example: the Visitor arrives on a page whose url contains /thanks/ for confirming the sending of the form or /contact/:


Always save the changes and for them to be reflected on the customer's site, click on “Send” then “Publish” then “Continue”
To confirm the shipment, GTM displays a quote from the Dalai Lama with an animation.
Step 3: Verify the installation
Congratulations, you have installed your Appvizer tracking scripts on your website!
Do a test
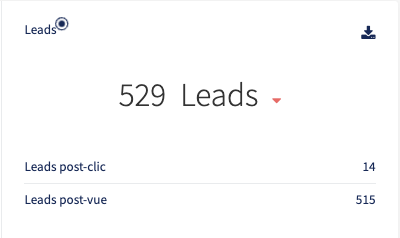
- Fill out your form to test and see if a conversion goes up in your Appvizer customer area.
- The conversions made on D-day will be visible on D-day+1 in your space.
Example:
Check on Chrome browser
Now, check that the installation has been completed correctly to make sure you don't miss any leads.
- Open your browser console;
- Go to the “Network” tab, then the “XHR” sub-tab;
- Check the “Preserve logs” option;

- Trigger the event by refreshing the page for example;
- Look for the term “appvizer” in requests: a request called “external-event” of the post type must be present. If you cannot find these events, the script is not properly installed.
- Verify the details of the information sent. The details for a conversion event are as follows:
{id: "AP-XXXXX", externalId: XXXXXXXX, event: "conversion"}<br>event: "conversion"<br>externalId: 1570191937253<br>id: "AP-XXXXX"
If the event field does not have the correct visit or conversion tag and the id field is not yours, the script is not well installed.
For more information on tracking scripts in Google Tag Manager, here is a series of dedicated articles: